Posted by admin
Posted on 12:42 PM
with No comments
It's another rainy day so I thought it would be the perfect opportunity to film a tutorial for the milkmaid braid. I really hope that it helps you out! It honestly is a lot easier to do than it probably looks. The best thing about this hair style is that it's perfect for those days where you just don't feel like washing and blowdrying and it's also great when you are in a rush and just don't have the time. You can wear it with a casual look or it will add a nice touch of elegance to something a little more dressed up. You can also make it messy or look more put together.
Here's some celebs rocking this look:
Check out my tutorial and let me know if you decide to try this out!
Posted by admin
Posted on 11:27 AM
with No comments
Today's post is all about the hair! I was in desperate need of some new brushes so I was really happy when Brush Love reached out to me to send me these 2 brushes. The first one is a Thermal Round Jumbo Brush from BrushLab and let me just say that it has made a huge difference when it comes to blow drying my hair. The round brush that I used before did not do my hair any justice. I found that every time I blow dried it looked really dry and frizzy and did not give me the natural volume that I wanted. I always had to use a flat iron afterwards and that wasn't the look I was going for. So after using this round brush for the past 2-3 weeks I can say with confidence that it's a must have! Price: $15.98
BENEFITS -Thermal ceramic coated barrel. Helps prevent over drying and damage -100% nylon bristles. Can withstand high temperatures -Cozi grip designed to prevent slip ups -Faster blow dry
The second brush they sent me is the Cushion Paddle Brush and I am loving the width. It really feels like I am massaging my scalp every time I brush my hair. The one I was using before was a lot smaller and it was more rough so sometimes it hurt to brush through. Not only do I use this for getting out tangles, but I also use it when I am blow drying. I like to go through once or twice after using the round brush. It's great for curling the ends under a little bit too. I love it! Price: $9.98
BENEFITS -Massages scalp -Heat resistant nylon bristles -Ideal for detangling and smoothing -Works on all hair types and textures
They also sent me a Hair Therapy Wrap in pink. The great thing about this is that is really helps to treat dry and damaged hair without you having to go to a salon AND it's cordless. It lets your deep conditioning products penetrate more deeply and it helps to strengthen your hair too. It comes with 3 gel packs that you heat up in the microwave and place inside the wrap. You leave it on for about 20 minutes and you will notice how soft it leaves your hair after. Since I have ombre highlights still, I always worry about my ends looking damaged from the dye, so this is great for me to continuously treat my hair at home. The wrap and gel packs are re-usable too which is awesome. Definitely recommend. Price: $29.98
BENEFITS -Deeply nourishes the roots and and scalp -Strengthens hair and hair cuticle to reduce damage -Softens hair and makes it more manageable
Check out my tutorial where I go into a little more detail on both brushes and show you the step by step process of how I blow dry my hair!
Just for being my followers you will receive a 20% discount on any order by entering code: affair20. This expires 6/30 and cannot be combined with any other promo.
Brush Love is also having a free shipping promo this summer on all orders in the US with no minimum!
AND
they are also doing their Question Of The Month Giveaway starting today 6PM EST. All you have to do is answer an easy question and they will randomly select winners. There will be 10 winners and you will get to select Brushlab brush of your choice!
Posted by admin
Posted on 4:37 AM
with No comments
CLICK TO SEE MORE
ph. Olja and me
Two weeks ago, i run out on this Ombre nail tutorial, and i immediately knew that i wanna test it and share it with you! So i grabbed all the stuff and started with it. Clean nails and you are ready to go. Just follow the instructions from the photos or from the original link above, and you will achieve the Ombre nail look very soon. Top three advices are: - be patient and let it dry completely before the next step, - use plastic sheet (or cellophane) instead of some paper or kitchen foil, due to paper fast absorption, - choose sponge with small holes because of the dabbing ...
I`m not into nail art at all, i like to keep them short and even painting them is a pretty hard-non liking thing for me! ;) But i gotta admit, i really like this Ombre, dip dye effect, especially with these ocean shades, and it`s perfect for summer! If you make your own version, i would love to see it! Upload it on FB page, or leave a link in your comment! :)
p.s. my nails are not perfect, so don`t judge them too hard, i love to bake and to clean my bathtub! ;)
After i saw on my twitter TL this PHOTO i wanted to recreate my version of Prada nails! :) So, you just need to choose which one is your favorite combo of stripes, mine are with green and blue, and paint them! I recommend you to start first with bright color and then to fill up empty space with black nail polish. Maybe we can't afford Prada's new collection, but we can have nails like this! ;) I will definitely wear green or blue combo with black dress and simple colored details! Do you like it?
Sinoć sam po prvi put dobila inspiraciju za novi post na twitter-u, nakon što sam ugledala OVU fotografiju, iako mi se nisu dopali, želela sam da napravim drugačiju verziju ovih Prada prugica! :) Moram vam priznati da ne volim uopšte šarene i iscrtane nokte, ali mi je ovo postalo jako simpatično. Lakovi, aceton i štapić i eto vam noktića! :) Moji nisu baš tako uredni, ali oprostićete mi jer sam više puta ponovila postupak kako bih vam pokazala svaku boju! :)
Saveti:
- nosite ih isključivo na kratkim noktima,
- uz npr.crnu haljinu i detalj u boji, nešto sasvim jednostavno - i naravno, samo jednu kombinaciju boja!
Omiljena mi je sa zelenom i plavom, i sigurno će biti na mojima rukama ovog leta! Update: nokte sam lakirala bez trakica... prvo svetlijom bojom povucete donju prugu, onda po sredini nokta a zatim ispunite prazan prostor crnim lakom! :) nadam se je sada bar malo jasnije! :)
1.Choose one of your favorite blogs, and click on follow with Google Friend Connect...
2.now you need to sign up with your your account: Gmail, Twitter or Yahoo....
3.type your email and password ( for your email) ....
4.and click done.....
5.this is how it looks like, when you follow some blog...
After this, you can easily leave your comment.... There is also the second way for leaving comments......type what you wanna say or ask in comment box and select profile.......
i choosen gmail again.....
type down your email and password.....
this will appear after that, just click on post comment.....
and your comment is on blog....
And this is a short video that Marina and I wanted to record for you, our lovely readers, but we sounded really funny, so we decided to make this mix of our several attempts....Hope that you will like it cause we enjoyed while we were preparing this post! :)
Veliki broj devojaka nam se obratio sa istim problemom, a to su poteškoće pri ostavljanju komentara, ali i oko praćenja samog bloga, pa smo Marina i ja rešile da vam u tome pomognemo! :) Krenimo redom. Postoje dva načina za ostavljanje komentara: prvi je ako kliknete na follow, koji se uglavnom nalazi pri vrhu sa desne ili leve strane, u zavisnosti od samog izgleda bloga, i pratite uputstva koja smo vam ostavile, a potom odete na post koji želite da prokomentarišete ili pitate nešto. Drugi način je da odete direktno na post koji vas zanima, napišete komentar i tek onda izaberete nalog preko kojeg ćete taj isti komentar objaviti. Jednostavno, zar ne?! A tu su i sličice da vam pomognu! :)
Nakon fotografija, želele smo da vam se zahvalimo i na malo drugačiji način, te smo napravile mini video, koji govori o tome koliko smo Marina i ja zabavile pripremajući ovaj post! :)
Veliko hvala, svima onima koji nas iz dana u dan prate, i ostavljaju svoje komentare koji nam mnogo znače! Nadam se da će ih od sad biti više jer se svakom podjednako radujemo! :)
Molimo sve drage blogere da share-uju ovaj i sličan post kod Marine, kako bi ga što veći broj ljudi pročitao! :)
p.s. Ako do sada to još niste činili , odlična je prilika da isprobate na ovom postu i ostavite vaš prvi komentar!:**
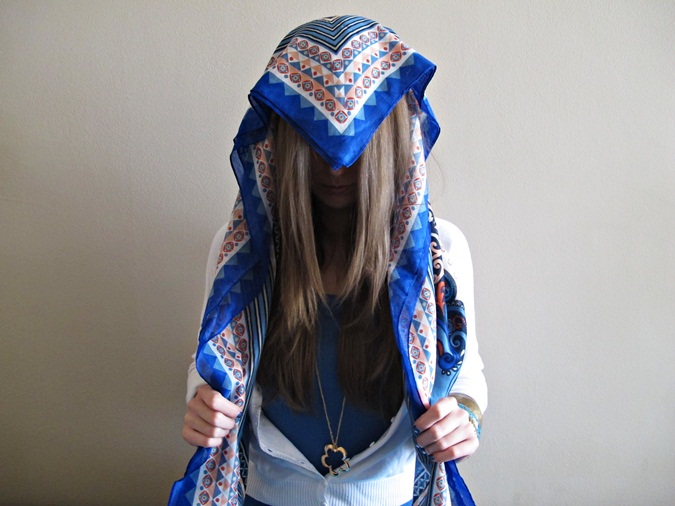
It's still cold here, with snow of course, so i don't want to leave my house at all! After that outfit post with turban, many of you requested tutorial!And here it is (i know that there are a lot of photos and videos with explanation, but this is only for you) !:) Some of the photos are blurry, but my sister was in a hurry for her school! :) Grab your favorite big square scarf, and follow those steps!It's easy!
Znam da ima dosta fotografija, i snimaka kako se pravi turban, ali pošto ste same to tražile, meni je ostalo samo da vam uslišim želju! :) I danas zamišljam proleće, stavila sam svoje letnje narukvice, tu je i belo/plava kombinacija, noktići imaju šljokice, al' Sunca nigde.... Imala sam neku viziju da ovaj tutorial napravim u prirodi, ali su vremenske neprilike učinile svoje. Izvinjavam se unapred na mutnim fotografijama, moja draga sestra je bila u žurbi zbog škole, bez velikog interesovanja za moj novi post!Hvala Mašo! :) Sada zgrabite omiljenu veliku, kockastu maramu, pa da počnemo! Kako vam ide? :) p.s.nisam mogla da budem toliko ozbiljna, te se tako nađe i ova poslednja fotografija u postu! :)